
- New Parts
- Used Parts
- Vehicles
- About

By Ace Auto on
With the current economic times, we are all looking for smarter ways to tighten the belt on our budgets and car repairs, especially if your vehicle is out of warranty.
Most of us have been driving cars since we were in our teens. For many, it’s almost impossible to imagine living without a car. Most of us also know the frustration of a car breaking down when you need it the most. Well, what if we told you that some of the most common reasons for car problems have easy fixes you could learn to do yourself?
With all the knowledge in the world at our fingertips, with ‘how-to” do just about anything you can imagine, YouTube tutorial videos freely available, more and more people are saving money by doing things themselves, such as handling their own home improvement projects, building their own pools, repairing their own plumbing issues. In addition to handling your own home improvement projects, why not consider these top ten tips for DIY Car repairs.
A regular car service can be quite a costly exercise but maintaining your vehicle in good running order and replacing worn out parts regularly will help keep you on the road until you can afford to have a professional service done. Do remember that some manufacturer warranties become null and void the moment you use a non-accredited workshop for your car’s service, so be willing to take that risk or make sure it is past the warranty period if that’s the case. Make sure you know what types of services are necessary and the mileages when services are due. Having a comprehensive service history will increase your cars resale value if ever you decide to sell.
Before you set about doing a service or any minor car repairs to your vehicle, you must make sure you have the correct tools.
Check out our Facebook page to see latest specials on parts and tools: https://www.facebook.com/AceAutoScrapyard
Tools you’re going to need for your DIY Car repair:
Tool Set
The first thing you need to do, before you become your own mechanic is to get yourself a good tool set with ratchets, an oil filter wrench, a spark plug wrench/spanner, HEX key, Pliers and screwdriver set. Check out hand tools that you may need for your car repairs. https://www.aceauto.co.za/search?search=tools
Jack and axle stand
You will also need a jack and axle stands as these ensure safety when working underneath the car. Always read the instructions on your owner’s manual on how and where the stands must be placed.
Fire Extinguisher
Another necessity is a fire extinguisher. Because you are working in an enclosed space with explosive fluids such as fuel and gas an extinguisher is a necessity.
An oil pan/drip tray and funnel
These are necessary for when you are draining the sump.
A trolly jack
This the easiest way to lift your car off the ground, just ensure that they are placed in the correct ‘jack points’.
Wheel chocks
These also a good idea as they stop the car from rolling either backwards or forwards.
A good torch
A strong light source will help you see what’s going on in a dim garage.
Oil filter wrench
Is a very handy tool to have when you’re doing filter changes, just ensure that when you remove the old oil filter the O-ring is also removed at the same time.
Parts you’re going to need for your car repair:
Before you begin your service, you can purchase a ‘Service kit’ specific to the make and year of your vehicle.
A service kit for your car repair will contain: Coolant, Air filter, Oil filter, Fuel filter, Brake fluid flush, Engine oil, Spark plugs.
Don’t forget to keep your Owner’s Manual handy and always make sure the car is completely cooled down before you begin any car repairs. Also making sure your car is on a level surface will help.
The following 10 tips will make doing your own car repairs a lot easier:
Use a Code Reader
Diagnose car problems without going to a mechanic with an auto code reader. Simply plug it into the car’s computer system, then interpret the trouble code readout to see what repairs you might need to do.
Change your oil
Dirty oil and undesirable liquids collect in the sump, which is located at the bottom of the engine. Remove the sump plug and drain the oil into a tray. Most sump plugs use a washer to guarantee a tight seal; this needs to be replaced every time you remove the sump plug. Having a registered waste company remove the dirty oil is the environmentally responsible way to dispose of your dirty oil. Once the main gush of oil is over you can remove the oil filter; some motoring stores have a tool for this but pushing a screwdriver through the soft walls of the oil filter will give you the purchase you need to unscrew the oil filter. Let the oil drain while you go about the rest of the service. Once you have drained the oil you can throw away the filter. Be sure to replace the oil filter, sump plug and washer before refilling the oil. Most cars use just over four liters of oil. As there are different grades of oil, you need to find out which one your car requires. Be careful not to overfill your car by checking the level regularly with the dipstick. Once you have achieved the correct level, run the motor for a few seconds before re-checking the oil level.
Replace Your Wiper Blades
To check whether your wiper blades need replacing simply press the washer button and see if your blades wipe clean. If they streak, it’s time to replace them. The auto parts store will have lots of economy blades but go with a reputable brand instead. They might cost more than economy blades, but their higher-quality rubber wipes better, has better UV protection and lasts longer. Lift the blades, as if you were washing your windshield by hand, and remove the old blades. Pay attention to how the old blades connect to the metal arms. On most models, you’ll see a tab on the underside of the wiper. Push the tab to remove the old blade. Be sure you have a firm grip on the wiper arm once you remove the old blade. If it gets away from you, it can hit the windshield with enough force to crack it.
Attach the new blades, being careful not to bend the wiper arms or scratch your windshield. Line everything up and make sure the new ones are secure and tight. If you get distracted or just can’t remember exactly how the new blades should fit on the wiper arm, don’t worry. The packaging for the new blades should have a general set of instructions and a helpful diagram.
Replace your filters
The in-line-fuel-filter (found under the vehicle near the fuel tank or in the fuel line under the hood) is easy to replace. Make sure you get the direction of the fuel right otherwise the car will not run properly. Use mechanical jubilee clips to secure the fuel line to each end of the filter rather than the spring steel clip types as these can sometimes fail. The air filter is usually housed in a plastic box with clips and should be the easiest part to change. Again, you must check that it is installed in the right direction or your car won’t be able to “breathe” properly.
Repair a dim headlight
If your car has a headlight that puts out about as much light as a flashlight with weak batteries, we’ve got two simple fixes for you. All you’ll need for the following fix is an adjustable wrench and a wire brush. Most dim headlights are caused by a corroded ground wire. Just trace the wiring harness from the back of each headlight assembly and see where it connects to the vehicle body. Give the connection a few strokes with the wire-brush.
Another possibility is that as headlight filaments age, they deposit a gray/brown film on the inside of the bulb (See Photo). Over time, that coating can reduce visibility by almost 300 ft. If your headlights aren’t as bright as they used to be, yank one of the bulbs and look for gray or brown residue on the glass. If you find any, replace both bulbs now and get back to seeing more of the road.
Change spark plugs
Always get the exact spark plugs for the make and model of your car. The gap in your spark plug should be set by the manufacturer and needs adjustment, so you won’t have to worry about “gapping” the plugs, because they’ll come pre-gapped. Treat spark plugs with the utmost care. It’s best to buy a spark plug spanner, especially one with a rubber insert that holds the spark plug in place while lowering it into the engine cavity. Do not over-tighten the spark plugs as this may break them. Be sure to replace the spark plug leads in the same order they were when you unplugged them. You should be able to locate your spark plugs fairly easily, because they’re attached to thick rubbery wires. You’ll find either four, six, or eight plugs, depending on how many cylinders your car has. Remove the wire to the first spark plug only. Do not remove all of the wires at once. Your spark plugs are installed in a certain order, which you need to maintain. Use your spark plug socket and extension on your ratchet to remove the first spark plug. Install the new spark plug, screwing it in by hand at first and then tightening it with a wrench for a snug fit. Do not over-tighten. Re-attach the spark plug wire. Repeat these steps for each spark plug, one at a time.
Replace the Air Filter
You need a new air filter for your car every 12 months or 12,000 miles, whichever comes first. You can pay a mechanic and give up your car for a day, or you can replace your air filter at home in about ten minutes. First, find your filter under the hood of your car. It’s in a black rectangular box with metal clips on the side. Check your owner’s manual if you don’t see it as soon as you pop the hood. Open up the casing and check out how the air filter fits inside it. Make a note of which way the filter faces.Remove the old air filter, and insert the new one exactly how the old one sat. Remember to close the metal clips when you’re done. You can extend the life of your new air filter by hitting it with some compressed air to clear out any debris.
How to change a Thermostat
The thermostat is usually located near the top of the engine under a “gooseneck” housing attached to the upper radiator hose. If yours isn’t there, consult your car manual to locate it. Pry off the gooseneck. Then remove the car thermostat from the engine or the inside of the gooseneck. In most cases, the cause of an overheating or no-heat condition in your vehicle is a faulty thermostat. And since the thermostat price can cost from between R200 to R600, it makes more sense to replace it than to spend hours diagnosing the problem. If that doesn’t fix it, at least you’re only out about two hours learning how to replace a thermostat. Pick up a new thermostat and gasket, as well as RTV sealant, fresh coolant (to top off the system) and hose-clamping pliers at an auto parts store. And while you’re there, ask the clerk for the torque specs for the gooseneck bolts. Then gather up your metric sockets, a plastic scraper and a drip pan. Slide the drip pan under the engine to catch the spilled coolant. Here’s how to change the thermostat: Remove the two or three bolts that hold the gooseneck in place and remove the thermostat. Next, clean both the engine and the gooseneck sealing surfaces. If the parts store gave you a plain gasket, coat one side with RTV sealant (self-adhesive gaskets don’t need sealant). Then install the thermostat and gasket. If the old thermostat used a rubber O-ring instead of a gasket, lubricate the new one with fresh coolant before you insert it. Reinstall the gooseneck and top off the coolant. You will need rags, a socket/ratchet set, a pair of hose-clamping pliers, a plastic scraper and a drip pan.
Removing scratches from paint
Scratches are the absolute worst. Even the tiniest scratches are visible from a distance and can kill the overall appearance of your metal monster. Unfortunately, it may cost you thousands to get them removed in a body shop. But you can save the money and the frustration with a simple DIY job. The steps include determining the depth of the scratch, lightly sanding the scratch, cleaning the area, applying rubbing compound, polishing the area with the rubbing compound, washing the area, and finally waxing the area to seal the repair. That’s it. You’ve just saved yourself a lot of money.
Changing a car battery
Car batteries tend to die on us at the most inconvenient times. If you’re in the middle of nowhere, your best bet would be to find roadside assistance and/or call a tow truck. But if you’re home and your battery shows signs that it might need replacement, the DIY replacement method is quite easy. The steps include removing any covers from the battery, disconnecting the negative cables, moving the clamp away from the battery post, doing the same for the positive cable clamp, removing all screws, replacing the old battery with the new one, and finally reconnecting the cable clamps. Make sure you label the cables before you remove them.
Some people use DIY to save themselves money and some people use it as a healthy way to escape from the stress of every-day life. They tap into skills they didn’t even know they had and pushed the limits of their creativity and what they thought they could do. Some people are more mechanical than others, but everybody can learn new skills and having the right tools and equipment definitely makes the tasks of minor car repairs less daunting. Mechanics are known to have a high level of self-reliance so if you find this is trait you possess then why not teach yourself new skills? Detecting problems and doing car repairs on your own car will not only give you an enormous sense of achievement but it will have the added bonus of saving you time and money.
By Alex Marques on
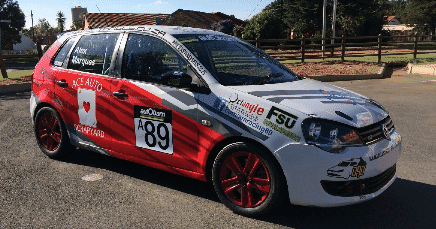
2017 is upon us and after the sale of our Mk1 Golf, pre-season was all about completing the new VW Polo Race car.
We had only 7 weeks to start and complete the car before the first race which meant many late nights, hundreds of phone calls and lots of driving around to get the correct parts. We cannot explain how tired we were day after day and night after night but we made the deadline!
These are the results
Firstly, a big thank you to my dad for helping with this build it's been a crazy month and a half starting from just a shell to getting it complete, all the late nights and long days have paid off. Thank you to my friends, family and fiancé for being so understanding of the many missed birthdays and outings to get the car complete.
Then to my sponsors, thank you for all your contributions without all of you we wouldn't be nowhere near complete.
A big thank you to Ace Auto Scrapyard for their massive contribution and endless supply of parts you had in your yard.
A big shout out to Wikus, Ashley, Barnie and the rest of the guys at Delarey Racing Developments and Goldwagen Delarey you guys put your heart and souls into the engine bay and it came out better then we could have ever imagined. Thank you for answering literally hundreds of questions and phone calls.
Thank you to FSU Developments for the awesome products once again, I can't wait to see the final product you have planned for the interior.
Rion and Andre Octangle Marketing & Signage have really transformed the appearance of the car thank you for helping with the idea and stepping it up a couple of levels, I can't stop staring at the car!
Fuchs Lubricants South Africa thank you for the continued and greater support in 2017! We going to smash this one!
Alex Marques
Team Principal/Driver
By Funeka Mayoyo on
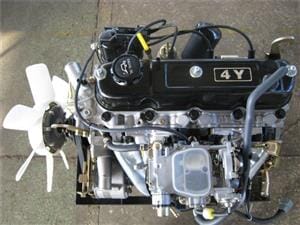
When it comes to purchasing an engine or gearbox, the secret to buying a good quality second hand engine or gearbox not only lies in how well you do your research and knowing exactly what you are looking for.
There are a large number of advantages one can gain from purchasing a second hand engine and or gearbox, such as…
- Second hand engines are always reliable as they are always almost original items. Considering that original parts are always a perfect fit, and are designed to last for years when maintained properly.
- Whether we realise it or not second hand engines and gearboxes when bought actually help with keeping our environment in impeccable conditions. As it’s another form of recycling known as upcycling.
- Second hand engines and gearboxes are cheaper when compared to new engines or gearboxes. Another excellent way you can save money when looking to get your car up and running.
Always consider a few of our pointers when purchasing a second hand engine or gearbox:
- Always check the history of the second hand engine or gearbox e.g. mileage, model and service history. In our case at ACE AUTO SCRAPYARD, all our vehicles are insurance accident damaged and come with a full service history.
- When going to inspect the engine or gearbox make sure all the parts of the engine or gearbox are intact and are in good working condition.
- Always check the guarantee of your engine or gearbox when you purchase it.
- Lastly, remember to run a full service on the engine and or gearbox you buy, yearly to ensure a longer and healthier life engine and gearbox.
Ultimately, it’s all about doing your research and not rushing into making any hasty decisions. Find out as much as you can about who you are planning to buy from. Other than that, second hand engines and gearbox’s could be the best thing you buy since sliced bread.
.jpg)
By Ace Auto on
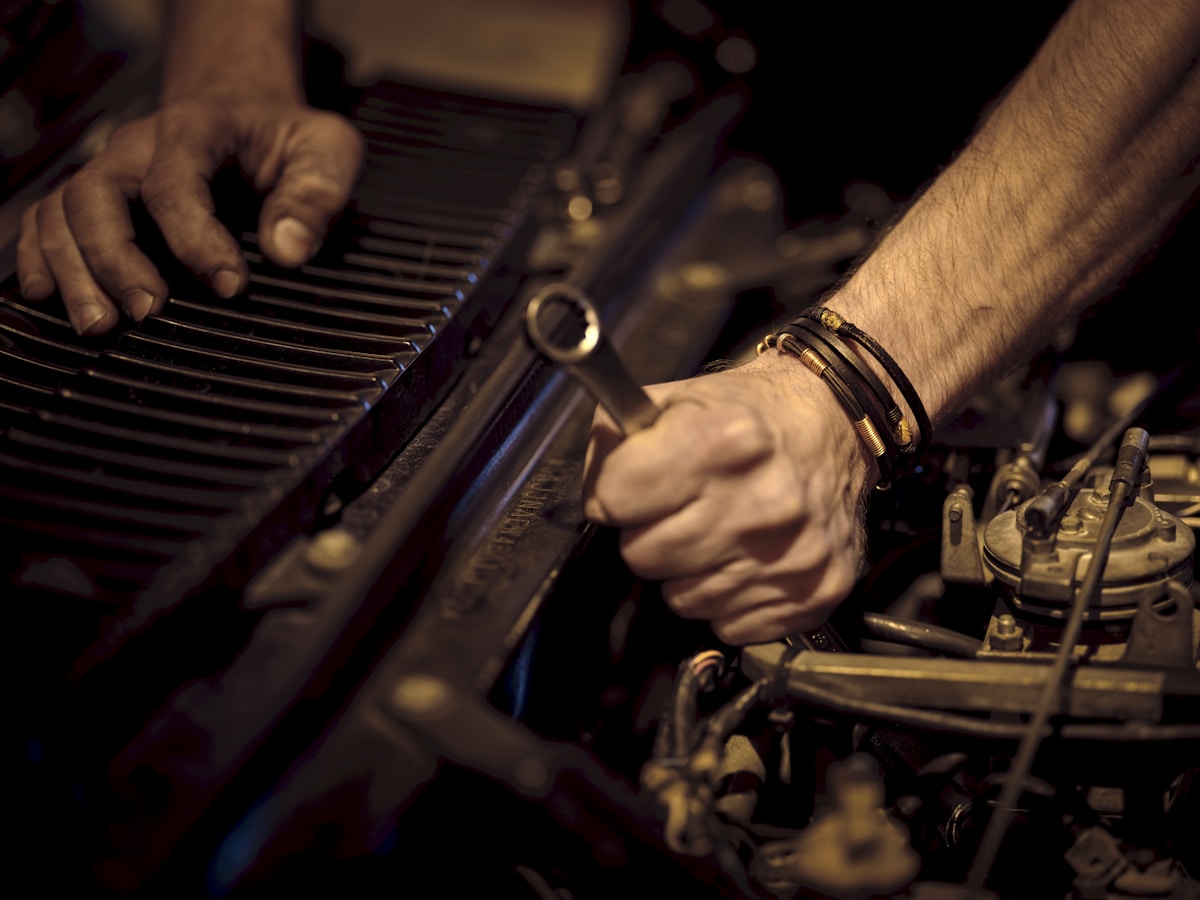
Modern day cars are usually very reliable but, even so, they can still develop issues from time to time. The first sign of trouble is usually a strange noise you’ve not heard of before. Those squeaks, rattles and knocks all mean something, you just have to be able to interpret them.
Here’s a quick guide to the most common noises to help you to better understand what your car is trying to tell you. The most important thing to remember is – don’t ignore that sound, whatever it is. It will only get worse, and the louder it gets, the more urgent the need for attention.
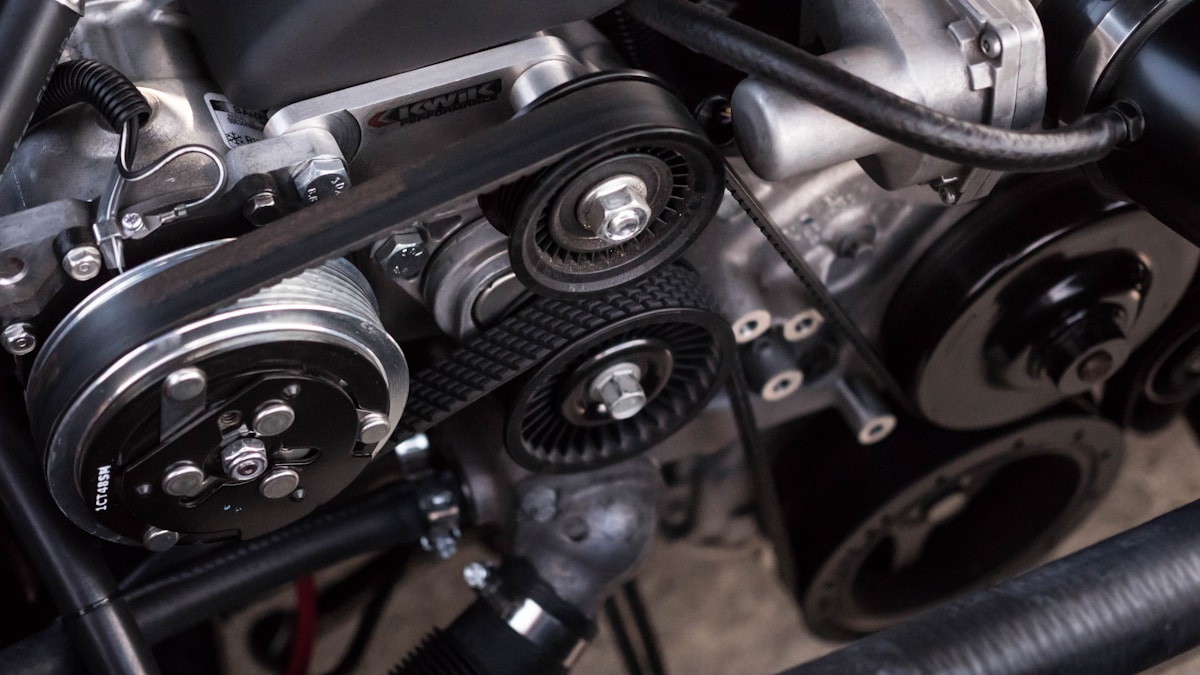
- Chirping or squealing noise when you accelerate
This is usually a loose, slipping belt, most likely the drive belt. This transfers power from the engine to areas such as the aircon, power steering and alternator. Over time, it can wear down and slip, hence the squealing sound.
- Noise from the front tyres when steering
This may indicate bearings that need to be replaced, or that there is steering linkage wear.
- Squealing sound when you brake
This is a pretty good indication that your brake pads are worn and need to be replaced. If it’s making a grinding noise, then you need to see your mechanic urgently as the pads are probably worn clear through, and this might mean that your rotors probably need replacing too.
- Loud roaring from beneath the car
If it sounds like you’re flying a plane rather than driving a car, your muffler in all likelihood has a hole in it and will need to be replaced. If the whole exhaust has to be replaced, consider getting a stainless steel exhaust, which is less likely to rust and wear-and-tear won’t happen as fast.
- Soft clicking noise from the engine
Your oil reservoir is trying to tell you it needs some TLC. This indicates that you are low on oil. If you replenish it and it’s still clicking, you likely have a leak or a blockage somewhere. Or it could be a valve train that needs adjusting. Either way a trip to the workshop is in order.
- Hissing noise from the engine
This is the sound of something leaking from the engine and making contact with the hot engine, hence the hissing. It could be oil, coolant or transmission fluid.
Your car will communicate with you when it’s in trouble, either with warning signs or the above noises. Be sure to keep an ear open when you drive and if you hear any of these noises, don’t delay in getting it checked out. Leaving it for too long will likely lead to even worse problems!
By Ace Auto on
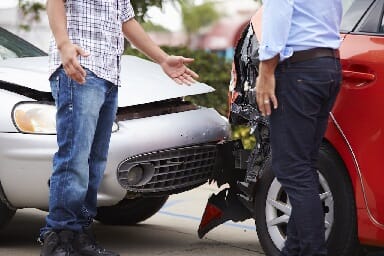
Have you ever been the first to arrive at an accident scene or been in one yourself? It can be overwhelming and stressful, which causes you to make silly mistakes or not follow the right process, so here are five easy-to-remember Do’s and Don’ts so that you do things right, without making yourself liable for a lawsuit at a later date.
Do – Stop and Help
If you are the first to arrive at the scene of an accident and can help, do everything you can to assist, until the police can get there. If anyone is injured on the scene, get professional help immediately by calling the police on 10111 and giving them the location of the accident. If your car is involved in the accident, you need to stop immediately. If you don’t, you’re committing a crime and can face a fine of up to R180 000 or nine years in jail, or both.
Do – Get all information
If you’re involved in the accident, be sure to get all information from the other person you have collided with. This includes the driver’s full name, ID number, address, telephone numbers and vehicle registration number. Also, try to get the name and contact details of at least one witness who saw the accident happen, if possible. This will help you later if the circumstances are contested, i.e., which driver was at fault. Be sure to take pictures of the vehicles from all sides before they are moved.
Do – Report the accident
Even if no one was hurt, you are still legally required to report the accident within 24 hours to your nearest police station. You will need to give your name, address, show your driver’s licence and the police will file an accident report.
Don’t – Interfere/Tamper with evidence
If someone has been injured in the accident, the vehicles may not be moved until the police give permission. If they are blocking the road, they can only be moved after their position has been marked in the road with spray paint or similar. If the vehicles are moved beforehand, it can be seen as evidence tampering and could ultimately get you into a lot of trouble.
Don’t – Get into an argument
If you are involved in an accident, the important thing is to stay calm. It won’t help to get into a fight with the other driver, even if they’re in the wrong. This could quickly escalate and make things worse. Take a deep breath, get all their details for insurance purposes and live to drive another day! If it looks like they’re going to leave the scene without giving you their details, be sure to take note of their registration number so you can report it to the police.
These Do’s and Don’ts are sure to prepare you for when the unexpected accident happens. You will know exactly what to do and how to react, and be less stressed.