
- New Parts
- Used Parts
- Vehicles
- About

By Ace Auto on 2026-03-03 11:00:48
Your car's air filter might be one of the most overlooked components under the bonnet, yet it plays a vital role in engine performance and longevity. For South African drivers navigating dusty roads and varying conditions, understanding when and why to replace your air filter can save you significant money on fuel and prevent costly engine repairs.
What Does an Air Filter Do?
The engine air filter prevents dust, dirt, sand, and debris from entering your engine's combustion chambers. Think of it as your engine's lungs — it ensures only clean air mixes with fuel for optimal combustion. In South Africa, where gravel roads, construction dust, and dry winter conditions are common, air filters work harder than in many other countries.
5 Signs Your Air Filter Needs Replacing
1. Reduced Fuel Efficiency
A clogged air filter restricts airflow to the engine, forcing it to work harder and consume more fuel. If you've noticed your car drinking more petrol than usual, a dirty air filter could be the culprit. Some drivers report up to 10% improvement in fuel economy after replacing a severely clogged filter.
2. Sluggish Acceleration
Does your car feel less responsive when you press the accelerator? Restricted airflow means less oxygen for combustion, resulting in reduced power output. This is especially noticeable when overtaking or climbing hills.
3. Unusual Engine Sounds
A properly running engine has a smooth sound. If you hear coughing, sputtering, or the engine vibrates more than usual at idle, insufficient air supply might be the cause.
4. Black Smoke from the Exhaust
When not enough air reaches the engine, the fuel-to-air ratio becomes too rich, causing incomplete combustion. This results in black sooty smoke from your exhaust — a clear sign something's wrong.
5. Check Engine Light
Modern vehicles monitor airflow and oxygen levels. A severely restricted air filter can trigger your check engine light due to improper air-fuel mixture readings.
How Often Should You Replace Your Air Filter?
Most manufacturers recommend replacing your engine air filter every 15,000 to 30,000 kilometres. However, South African driving conditions often demand more frequent changes:
- Urban driving: Every 20,000-25,000 km
- Gravel or dirt roads: Every 10,000-15,000 km
- Dusty farming areas: Every 8,000-12,000 km
- Construction zones: Check monthly, replace as needed
A good practice is to inspect your air filter every time you change your oil. If you can't see light through it when held up, it's time for a replacement.
Choosing the Right Air Filter
Air filters come in different types:
- Paper filters: Most common and affordable. Effective for normal driving conditions.
- Cotton gauze filters: Reusable and washable. Better airflow but require regular cleaning.
- Foam filters: Excellent for dusty conditions. Popular for bakkies and 4x4s used off-road.
Always match the filter to your specific vehicle make and model for proper fitment. Using the wrong size compromises filtration and can allow unfiltered air into your engine.
The Cost of Ignoring Your Air Filter
A new air filter typically costs between R150 and R400 depending on your vehicle. Compare that to the potential costs of neglecting it:
- Increased fuel consumption: R200-500+ extra per month
- Engine wear from particles: Thousands in repairs over time
- Catalytic converter damage: R8,000-R25,000 to replace
- Complete engine rebuild: R30,000+
A simple filter replacement is one of the most cost-effective maintenance tasks you can do.
Can You Replace It Yourself?
Air filter replacement is one of the easiest DIY maintenance tasks. Most filters are accessible by opening the air box (usually secured by clips or screws), removing the old filter, and inserting the new one. The entire process takes 5-10 minutes and requires no special tools.
Find the Right Air Filter at Ace Auto
Whether you drive a Toyota Hilux tackling farm roads, a VW Polo in city traffic, or a Ford Ranger on construction sites, we stock air filters for most makes and models. Our team can help you find the correct fitment and advise on the best filter type for your driving conditions.
Don't let a R200 part cost you thousands in repairs. Check your air filter today and breathe easy knowing your engine is protected.

By Ace Auto on 2026-03-01 11:01:08
As South Africa transitions from the dry summer months into autumn and winter, your windscreen wipers become one of the most critical safety components on your vehicle. Worn or damaged wipers can turn a rainy drive into a dangerous situation with reduced visibility. Here's everything you need to know about maintaining your wipers and choosing the right replacements.
Why Windscreen Wipers Matter More Than You Think
Your windscreen wipers are your first line of defence against rain, dust, and debris. In South Africa, where sudden thunderstorms can reduce visibility to near-zero in seconds, having wipers that work properly isn't optional—it's essential for safety.
Most drivers only think about their wipers when they're already struggling to see through a streaky windscreen. By then, you're compromising your safety and that of other road users.
5 Signs Your Windscreen Wipers Need Replacing
1. Streaking and Smearing
If your wipers leave streaks or smears across the glass instead of clearing water cleanly, the rubber blade has hardened or cracked. This is the most common sign of worn wipers and usually the first to appear.
2. Squeaking or Chattering Sounds
Wipers should glide smoothly across your windscreen. Squeaking, chattering, or juddering indicates the blade isn't making proper contact with the glass. This could be due to worn rubber, a bent wiper arm, or debris stuck under the blade.
3. Skipping Across the Windscreen
When wipers skip or hop across sections of glass rather than sweeping smoothly, the blade has likely warped or lost its flexibility. South Africa's intense UV exposure accelerates rubber degradation.
4. Visible Damage to the Rubber
Inspect your wiper blades regularly. Look for cracks, splits, or chunks missing from the rubber edge. Any visible damage means it's time for replacement—don't wait for the next rainstorm to find out they're not working.
5. Uneven Pressure or Missed Spots
If parts of your windscreen remain wet or dirty while other sections clear properly, the wiper blade has lost its even pressure. This often happens when the metal frame becomes bent or corroded.
How Often Should You Replace Your Wipers?
As a general rule, windscreen wipers should be replaced every 6 to 12 months. However, in South Africa's harsh climate—with intense summer heat and UV exposure followed by winter rains—many wipers deteriorate faster.
Consider replacing your wipers:
- Before the rainy season starts (typically March-April in most regions)
- After extended periods of heat and sun exposure
- Immediately when you notice any of the warning signs above
Choosing the Right Replacement Wipers
Conventional Frame Wipers
These traditional wipers use a metal frame with multiple pressure points. They're affordable and widely available for most vehicles. However, the exposed frame can collect ice and debris, and they may not conform as well to curved windscreens.
Flat/Beam Blade Wipers
Modern flat blades use a single curved beam to distribute pressure evenly across the entire blade length. They're more aerodynamic, quieter at high speeds, and better suited to curved windscreens. Many newer vehicles come standard with flat blades.
Hybrid Wipers
Combining the best of both designs, hybrid wipers use a covered frame for durability with a streamlined shape for better performance. They're an excellent middle-ground option.
Wiper Maintenance Tips
Extend the life of your wipers with these simple maintenance habits:
- Clean your wipers regularly – Wipe the rubber edge with a damp cloth to remove dirt and grime that accelerates wear
- Clean your windscreen – A dirty windscreen causes extra friction that wears down wiper blades faster
- Lift wipers off the glass in extreme heat – Preventing the rubber from baking against hot glass extends blade life
- Don't use wipers on a dry windscreen – Always use washer fluid; dry wiping causes friction damage
- Replace both wipers together – They wear at similar rates, so replace as a pair for consistent performance
Don't Forget the Rear Wiper
If your vehicle has a rear windscreen wiper, it needs the same attention. Rear wipers often get neglected because they're used less frequently, but when you need rear visibility in heavy rain, a worn rear wiper can be just as dangerous as worn front wipers.
Find the Right Wipers at Ace Auto
At Ace Auto Parts, we stock windscreen wipers for virtually every make and model on South African roads. Whether you drive a Toyota Hilux, VW Polo, Ford Ranger, or any other popular vehicle, we can help you find the correct wiper size and type.
Not sure which wipers fit your car? Contact us with your vehicle details—year, make, model, and variant—and we'll point you to the right parts. With branches in Springs, Cape Town, George, and Middelburg, quality parts are never far away.
Don't wait for the first big storm to discover your wipers aren't up to the job. Replace them now and drive safely through the rainy season ahead.
By Ace Auto on 2026-02-27 11:01:00
Your car's oil filter might be small, but it plays a massive role in keeping your engine healthy. For South African drivers dealing with dusty roads, stop-start traffic, and extreme temperatures, choosing the right oil filter isn't just maintenance—it's protection for your engine.
What Does an Oil Filter Actually Do?
The oil filter removes contaminants from your engine oil—metal particles, dirt, carbon deposits, and sludge. Without a quality filter, these particles circulate through your engine, causing premature wear on bearings, cylinder walls, and other critical components.
Think of it as your engine's kidneys. Just like your body, your car needs clean fluids to function properly.
Types of Oil Filters Available
1. Spin-On Filters
The most common type for passenger vehicles. These self-contained units screw directly onto the engine block. They're easy to replace—unscrew the old one, screw on the new one. Most Toyota, VW, Ford, and Hyundai models use spin-on filters.
2. Cartridge Filters (Element Filters)
Found in many European vehicles like BMW, Mercedes-Benz, and newer VW/Audi models. Only the filter element is replaced while the housing stays on the engine. These are often more environmentally friendly since you're not discarding the metal canister.
3. Magnetic Filters
These contain magnets to capture metallic particles. While effective for metal debris, they don't catch non-metallic contaminants, so they're usually used alongside conventional filters.
Key Factors When Choosing an Oil Filter
Micron Rating
This indicates the size of particles the filter can trap. Lower numbers mean finer filtration:
- 20-40 microns: Standard filtration (budget filters)
- 10-20 microns: Good filtration (mid-range filters)
- 5-10 microns: Excellent filtration (premium filters)
For South African conditions with dusty roads, we recommend filters in the 10-20 micron range or better.
Filter Media
Cellulose (paper): Budget-friendly, adequate for standard driving. Needs more frequent changes.
Synthetic: Better filtration and flow, lasts longer. Ideal for extended service intervals or synthetic oil.
Blended: Combines both materials for a balance of cost and performance.
Bypass Valve
A quality filter includes a bypass valve that allows oil to flow even if the filter becomes clogged. This prevents oil starvation—a critical safety feature. Cheap filters often have weak or non-existent bypass valves.
Anti-Drain Back Valve
This rubber membrane prevents oil from draining out of the filter when the engine is off. Without it, you get dry starts where the engine runs momentarily without oil pressure. Look for filters with a silicone anti-drain valve—they last longer than rubber ones.
Popular Oil Filter Brands in South Africa
- Bosch: German engineering, excellent quality, widely available
- Mann-Filter: OEM supplier to BMW, Mercedes, VW—premium quality
- Fram: Good mid-range option, readily available at most auto stores
- Ryco: Australian brand popular for Asian vehicles
- Champion: Solid performer at competitive prices
How Often Should You Change Your Oil Filter?
The general rule: change your oil filter with every oil change. In South Africa, that typically means:
- Mineral oil: Every 5,000 - 7,500 km
- Semi-synthetic: Every 7,500 - 10,000 km
- Full synthetic: Every 10,000 - 15,000 km
If you drive in dusty conditions (gravel roads, construction areas), consider shorter intervals regardless of oil type.
Signs Your Oil Filter Needs Attention
- Engine running hotter than normal
- Reduced fuel efficiency
- Engine noise or knocking
- Dirty exhaust smoke
- Low oil pressure warning light
Don't Cheap Out on Your Oil Filter
An oil filter costs between R50 and R250. Your engine costs tens of thousands to replace. The math is simple—invest in a quality filter from a reputable brand.
At Ace Auto Parts, we stock oil filters for virtually every make and model on South African roads. Whether you drive a Toyota Hilux, VW Polo, Ford Ranger, or BMW 3 Series, we've got the right filter at the right price.
Need Help Choosing?
Not sure which oil filter fits your vehicle? Give us a call or WhatsApp us with your car's make, model, and year. Our team will find the exact filter you need—and we can check stock at your nearest branch instantly.

By Ace Auto on 2026-02-25 11:01:04
Driving at night on South African roads demands reliable headlights. Whether you're navigating poorly lit rural roads or dealing with oncoming traffic on the N1, your headlight bulbs make a critical difference to safety. Here's everything you need to know about upgrading your car's headlights.
Why Headlight Bulbs Matter More Than You Think
Dim or yellowed headlights don't just make driving harder—they're dangerous. Studies show that reaction time drops significantly when visibility decreases. In South Africa, where load shedding can knock out street lights and many roads lack proper illumination, quality headlight bulbs are essential.
Factory-fitted bulbs typically last 500 to 1,000 hours. If your car is more than three years old, there's a good chance your bulbs are operating below their optimal brightness.
Types of Headlight Bulbs Explained
Halogen Bulbs
The most common type found in South African vehicles. Halogen bulbs are affordable, easy to replace, and widely available. They produce a warm yellowish light and typically last 500-1,000 hours. Most popular fitments include H4, H7, H1, and H11.
LED Bulbs
LED headlight bulbs offer brighter, whiter light while using less power. They last significantly longer—often 25,000+ hours—and produce less heat than halogens. However, not all LED upgrades are legal for road use, so check that your chosen bulbs are SABS approved.
HID/Xenon Bulbs
High-Intensity Discharge bulbs produce an intense, bright white or blue-tinged light. They're more efficient than halogens but require a ballast to operate. Retrofitting HID bulbs into halogen housings is illegal in South Africa and can blind oncoming drivers.
How to Choose the Right Bulb for Your Car
Step 1: Check your owner's manual for the correct bulb type. Common types include:
- H4 – Combined high and low beam (common in Toyota, VW, Ford)
- H7 – Single filament low beam (BMW, Mercedes, Audi)
- H1 – Single filament high beam
- H11 – Fog lights and some low beams
- 9005/9006 – Common in Japanese vehicles
Step 2: Decide on brightness. Standard bulbs are rated around 1,000-1,500 lumens. Upgraded halogen bulbs can reach 1,500-2,000 lumens. For night driving on dark roads, a brighter bulb makes a real difference.
Step 3: Consider colour temperature. Measured in Kelvin (K):
- 3,000K – Yellow/warm light (good for fog)
- 4,300K – Warm white (factory standard)
- 5,000-6,000K – Bright white (popular upgrade)
- 6,500K+ – Blue-white (can reduce visibility in rain)
Top Headlight Bulb Brands Available at Ace Auto
We stock quality headlight bulbs from trusted brands:
- Philips – Premium quality, excellent light output
- Osram – German engineering, OE supplier to many manufacturers
- Narva – Reliable aftermarket option, good value
- Ring – Budget-friendly without sacrificing safety
DIY Headlight Bulb Replacement Tips
Replacing headlight bulbs is one of the easiest DIY maintenance tasks:
- Open your bonnet and locate the headlight assembly from behind
- Disconnect the electrical connector
- Remove the rubber dust cover (if fitted)
- Unclip or unscrew the retaining mechanism
- Remove the old bulb without touching the glass
- Insert the new bulb—never touch the glass with bare fingers (oils cause hot spots)
- Reassemble in reverse order
Pro tip: Always replace bulbs in pairs. If one has dimmed or failed, the other is likely not far behind. Mismatched bulbs also look odd and may affect visibility.
When to Upgrade Your Headlights
Consider a headlight bulb upgrade if:
- Your bulbs are more than 2-3 years old
- You struggle to see clearly at night
- Your headlights appear dim or yellowish
- You do a lot of night driving or highway travel
- One bulb has blown (replace both)
Legal Requirements in South Africa
South African road regulations require:
- Two white or yellow headlights facing forward
- Proper beam alignment (checked at roadworthy testing)
- No blue or coloured headlights (except fog lights)
- HID retrofits without proper projector housings are illegal
Stick with quality, road-legal bulbs to avoid fines and ensure your vehicle passes its next roadworthy inspection.
Find Your Headlight Bulbs at Ace Auto
Not sure which bulb fits your car? Our team can help. Search our online catalogue or contact us with your vehicle details—make, model, and year—and we'll find the right headlight bulbs for your car. We offer both standard replacements and performance upgrades at competitive prices, with nationwide delivery across South Africa.
Don't let dim headlights compromise your safety. Upgrade today and see the road clearly, whatever time you're driving.
By Ace Auto on 2026-02-23 11:01:03
Your car's water pump is the heart of the cooling system, circulating coolant through the engine to prevent overheating. When it fails, the consequences can be catastrophic—from a stranded vehicle to a completely seized engine. For South African drivers dealing with hot summers and long highway trips, knowing the warning signs of water pump failure is essential.
What Does a Water Pump Do?
The water pump is a belt-driven or electric component that continuously circulates coolant between the engine and radiator. It keeps your engine operating at the optimal temperature, typically between 90°C and 105°C. Without proper coolant circulation, your engine can overheat within minutes.
6 Warning Signs Your Water Pump Is Failing
1. Coolant Leaking at the Front of Your Car
One of the earliest signs of water pump trouble is coolant pooling under the front of your vehicle. The pump uses gaskets and seals that deteriorate over time. If you notice green, orange, or pink fluid under your car, have it checked immediately. Even a small leak can lead to overheating on a long drive.
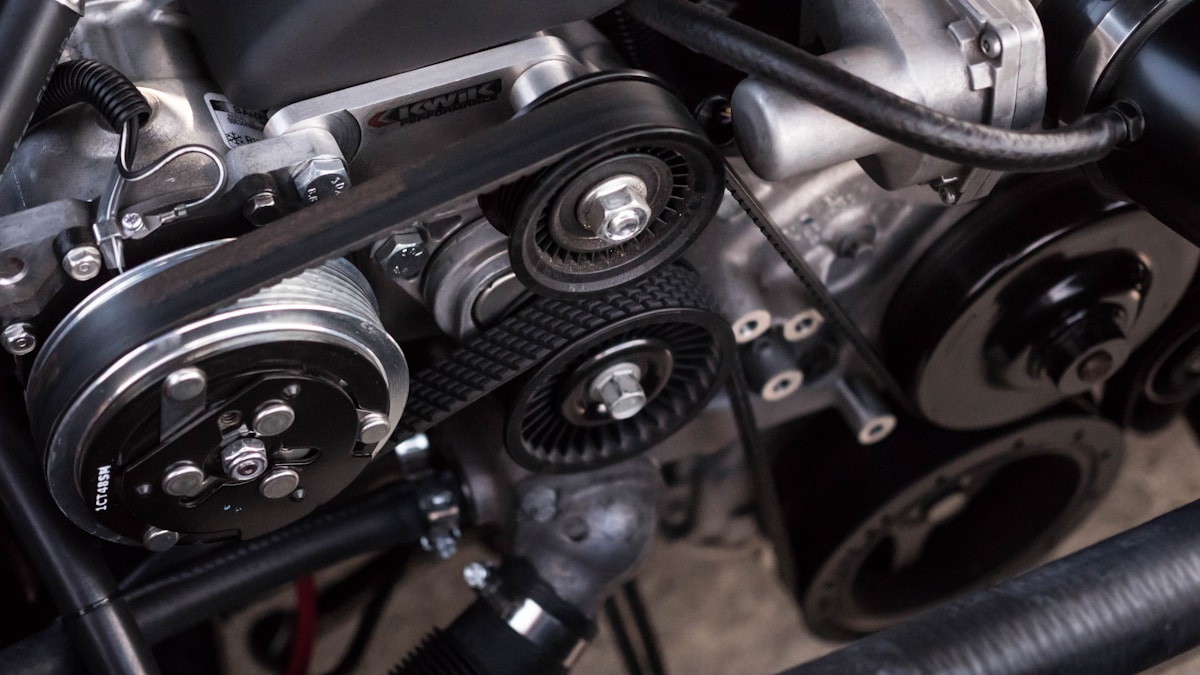
2. Whining or Grinding Noise from the Engine Bay
A failing water pump bearing often produces a distinctive whining or grinding sound. This noise typically increases with engine speed. If you hear unusual sounds coming from the front of the engine—especially near the timing belt or serpentine belt area—the water pump bearing may be worn.
3. Engine Overheating
If your temperature gauge creeps into the red zone or you see the warning light, pull over immediately. While overheating can have multiple causes, a failed water pump is a common culprit. Continuing to drive with an overheating engine can warp the cylinder head or crack the engine block—repairs that cost tens of thousands of rands.
4. Steam Coming from the Radiator
Steam billowing from under the bonnet is never a good sign. It indicates coolant has reached boiling point, often because the water pump isn't circulating it properly. Switch off your engine immediately and let it cool before investigating.
5. Rust or Deposit Build-up Around the Pump
During routine inspections, look for corrosion, scale, or rust around the water pump housing. This build-up often indicates a slow leak or contaminated coolant. Using the wrong coolant type or neglecting to flush the system accelerates pump wear.
6. Wobbly or Loose Pulley
The water pump pulley should spin smoothly without any play. If you can wobble it by hand or hear it rattling, the pump bearings are failing. A loose pulley can also cause belt slippage, reducing cooling efficiency.
When Should You Replace the Water Pump?
Most water pumps last between 100,000 and 150,000 kilometres. However, timing belt-driven pumps should be replaced whenever you change the timing belt—typically every 100,000 km or as specified by your vehicle manufacturer. Since the timing belt already has to be removed to access the pump, it makes sense to replace both together and save on labour costs.
Vehicles with Common Water Pump Issues in South Africa
- Volkswagen Polo/Golf: Often shows leaking at high mileage; replace with timing belt
- Toyota Corolla/Hilux: Generally reliable but check at 150,000 km
- Ford Ranger: Listen for bearing noise from 120,000 km onwards
- Hyundai i20/i30: Prone to seal leaks; inspect during services
DIY vs Professional Replacement
Water pump replacement complexity varies significantly by vehicle. On some older models with externally mounted pumps, it's a straightforward job. However, modern vehicles with timing belt-driven pumps require precise belt tensioning and timing mark alignment—a mistake here can cause catastrophic engine damage.
Unless you're experienced with engine work, we recommend having a qualified mechanic handle the replacement. The labour savings aren't worth the risk of a mistimed engine.
Choosing the Right Water Pump
When shopping for a replacement water pump, consider these factors:
- OEM vs Aftermarket: OEM pumps offer guaranteed fitment but cost more. Quality aftermarket brands like AISIN, GMB, and Graf provide excellent reliability at lower prices.
- Material: Metal impeller pumps generally outlast plastic impeller versions, especially in high-heat environments.
- Complete Kit: Many water pump kits include new gaskets, seals, and sometimes the thermostat—everything you need for a complete job.
Find Your Water Pump at Ace Auto Parts
At Ace Auto Parts, we stock water pumps for most vehicle makes and models driven in South Africa. Whether you need a pump for a VW Polo, Toyota Hilux, Ford Ranger, or Hyundai i30, we've got you covered with quality parts at competitive prices.
Not sure which pump fits your vehicle? Contact our team—we'll match the right part to your specific make, model, and engine code.